WordPress Editing
Editing text in WordPress is a simple process that can be done by following these steps:
Log in to your WordPress dashboard by entering your username and password.
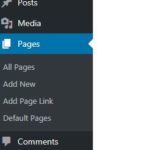
Once you are logged in, you will be taken to the main dashboard screen. From here, click on “Posts” or “Pages” on the left-hand side of the screen, depending on which content you want to edit.
Find the post or page you want to edit, and hover your mouse over it. You will see a list of options appear beneath the title. Click on “Edit” to start editing the content.
Once you are in the editor, you can make changes to the text by clicking anywhere in the content area and making your changes. You can also use the formatting tools at the top of the editor to add headings, bold or italicize text, or create bulleted or numbered lists.
If you want to add images, videos, or other media to your content, you can do so by clicking on the “Add Media” button at the top of the editor.
When you are finished editing your content, click on the “Publish” button in the top right corner of the screen to save your changes and make your content live on your website.
Editing text in WordPress is a straightforward process that can be done in just a few clicks. With a little practice, you will be able to edit your content quickly and easily, allowing you to keep your website up-to-date with fresh, relevant content for your readers.
Login by going to your website and adding /wp-admin to the end of it (ie https://www.”yourwebsite.com”/wp-admin).
You can use your email or username plus your password.
When you are logged in, you’ll be looking at a dashboard with all sorts of things in the left hand side. To begin with you only need to learn to do a few basic things.
At the top left of your screen you can hover over “View Site” or “View Page”, and then browse the site normally to get to the page you want to edit. You’ll see a link at the bottom of each page to edit it.
The page content consists of blocks specifically for text, images, tables or PDFs etc. You can make changes to existing blocks. Remember to click on update and to wait for changes to be saved. You can then click on “View page” to see how it looks to users.
If you want to add some new content to a page, you’ll see there are various ways you can add new blocks and position them where you want them.

Brief guide to what the main blocks do
This is a Heading block
This is a paragraph block where you can enter text
The block below is a gallery where you can upload images. You can control how many images appear in a column


Or, you can add an image into an image block. In this instance we have added a column (with 3 cols) and added an image into each one, and added a separator below each to make it stand out a bit. Images can have captions and can be made to link to internal or external pages.

or we could even text wrap an image like this, and you can crop the images, added them as thumbs or full size.